Each year I ask my son the same question, usually about six or seven times, “What would you like to be for Halloween?” His normal response is “I don’t know” but then he starts to think about the things he likes. I have been making his costumes handmade for a couple of years now by his request. Most of the time I just use boxes because it’s easier for me to work with.
My son thought about it for a while, he came up with a few ideas but the one he decided on was the DeLorean car from the movie Back To The Future. I thought that was such a cool and fun idea to work with and I was all about this project. I’m not sure where exactly he got this idea from because I don’t think he’s ever watch the movie before, maybe from a video game or something.
The first thing that I always do is I search online for hours on Pinterest – it’s such a great site for ideas. I saw a few DIY DeLorean costumes while scrolling, most of them were made attached to some pulling device and I didn’t want to go in that direction. I found a bunch of boxes and started making outlines on big pieces for me to cut out. I traced out two long doors, back windshield, front windshield, hood, front end, and the wheels.
Once I finished tracing those pieces I cut them out using an x-acto knife. Then I got some paint – I used gray and black acrylic Folk Art paints because they are pretty cheap. I painted each individual piece gray, and then black for the windshields and the wheels.
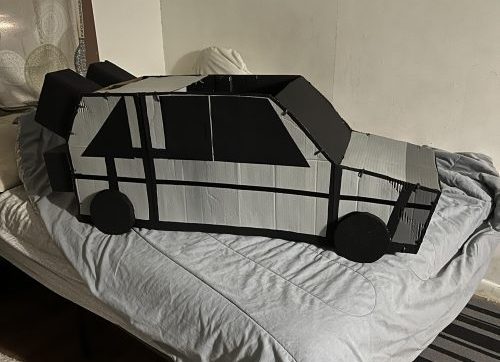
When everything is finished drying, I put it all together by punching holes in each piece of box and attaching them using some zip ties. I got some construction paper and traced out some windows and glued them on to the car. I used some painters tape and marked out the stripes I wanted to paint black, and just a little bit of a darker shade of gray on the front end.
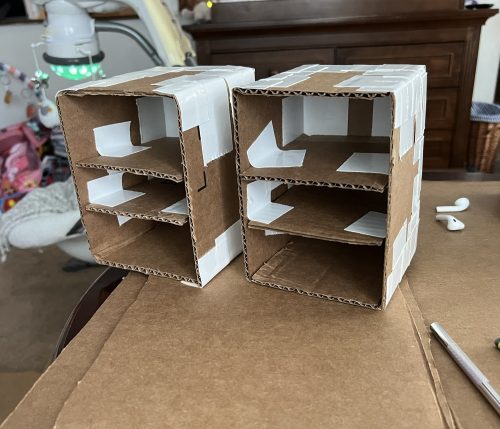
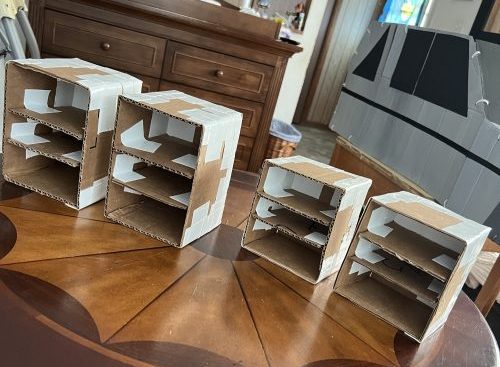
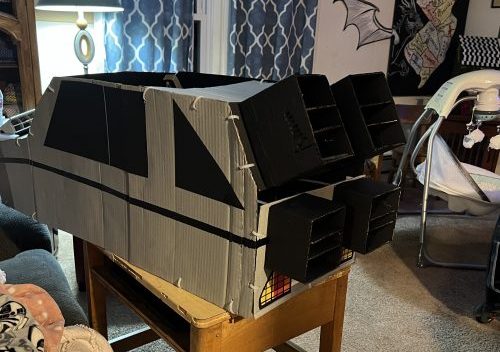
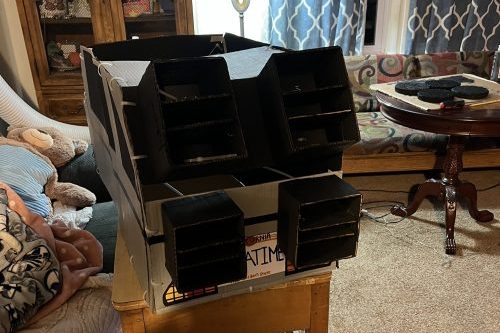
I made four exhaust pipes out of boxes also – same thing I did before, tracing out small pieces and this time I used duct tape to attach them. Once that was all done, I painted all four of those exhaust pipes with a flat black matte paint, same brand. Punch some holes in the middle of the exhausts pipes, punch some holes on the back of the DeLorean – make sure they are even with each other and attach with zip ties.
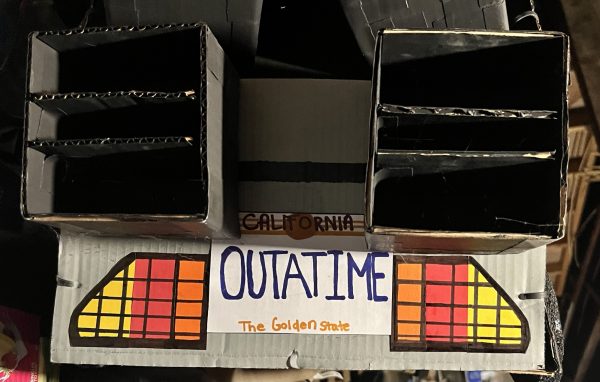
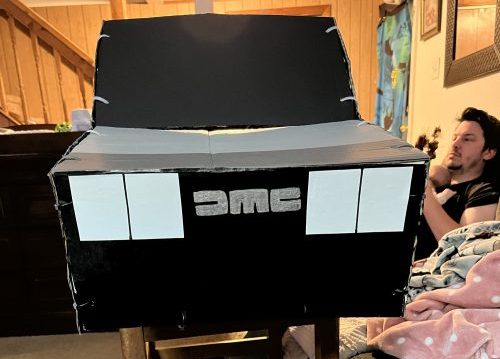
I painted the front of the vehicle with flat black matte, traced out the letters for D M C and filled them in with a metallic gray. I got some white cardboard paper and cut out two rectangular shapes for the headlights. The back of the vehicle was a bit tricky – I had to make a support bar for the upper set of exhaust pipes to keep them lifted up.
I made the license plate out of white cardboard paper as well, I just went online and looked for the same plate that’s in the movies for a reference. I made the tail lights out of construction paper – cut out red, orange, and yellow and glue them together and then use a black marker for the outline, glue them on to the car.

The car was just about done, we needed a few more finishing touches and then it’s ready. We found some old suspenders in the closet and we attached them to the inside of the box, this way my son had something for support. We also added some battery-operated lights around the whole car to give that light-up/launch style.

This project was a lot of fun and my son was so happy with the results. We went trick-or-treating and he was just a hit! The older crowds were pleased to see such nostalgia, and the kids from the streets ran over to see the costume and touch all the cool stuff. By the end of the night, I was carrying the costume around as usual, but when I see my son and how happy this makes him, I never mind.

Here’s the supplies that I used to make this DIY Back To The Future DeLorean Halloween Costume:
- 3-4 medium/large sized boxes
- Black matte, grey, dark grey, metallic grey acrylic paint
- Construction paper (black, red, orange, yellow, white)
- White cardboard paper
- X-acto knife
- Duct tape
- Painters tape
- Zip ties
- Colored markers
- Black marker
- 1 pair of suspenders
- 1 battery-operated light pack

Leave a comment