In my last post I mentioned how my son wanted me to make two Halloween costumes for him; the first costume was a Creeper from Minecraft, the second costume was a Nintendo Switch. Making the Creeper was pretty simple – I found an old box with a similar shape of the Creeper and then went online looking for ideas on how to put the pieces together.
After that was finished, I moved on to coming up with a design for making a Nintendo Switch costume. Naturally, I went to Pinterest searching for some ideas and I couldn’t find much. Most of the pins were just on how to make yourself into a joystick controller or of an Nintendo product advertisement. This wasn’t very helpful so I decided to just make something up myself.
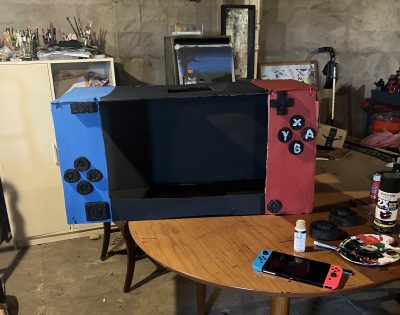
Fortunately enough, I have one of these consoles so I used that as a model for my project. The next thing I did was I went looking for more boxes! I found a box of similar shape to the Switch and used that as a base to work and build with. Then I got a sharp x-acto knife and cut an opening on the front of the box to make it look like the black screen. I also made an opening on the top of the box for my son to pop his head through and on the bottom for his legs. I used zip ties to keep the box together in certain places I had to cut.
Grab some black, blue, red, and white paints for the colors. I just used some basic acrylic Folk Art paint – nothing fancy. Grab some painters tape as well to tape off the sections you want to paint. One side is going to be painted blue, the middle will be painted black and the inside as well, and the other side will be painted red.

For the buttons, directional pads, and joysticks on the costume, I used some Styrofoam blocks and I cut out the shapes. Paint all of the pieces black and glue them onto the box, I used a hot glue gun. Paint the A,B,Y, and X buttons with white paint. Turn the box around and trace out the letters N I N T E N D O on the back of the box, fill the letters in with white paint.

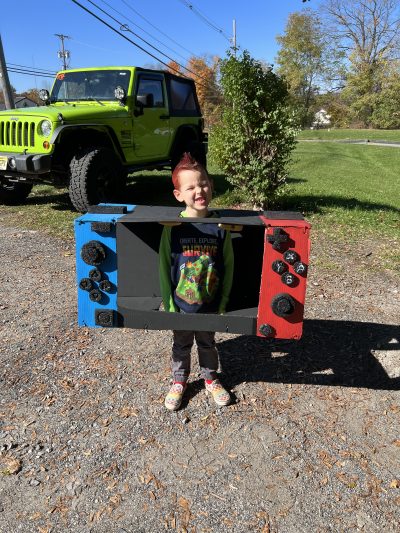
On the inside of the box we decided to put some lights in there with a working switch that turns on and off. I used a light strip and taped that to the inside and my boyfriend is the one who connected it to the switch – that part was his idea! Blue is one of my son’s favorite colors so we went with that choice. Once that was complete it was time to let my son try it on and see how it looks.
This was such a fun costume to design and create, my son was so happy with the results. We ended up entering two Halloween costume contests – the first place was at a Zoo & Museum and all of the kiddos were winners. The second place was at a Bowling Alley and my son won first place for best costume of the night!
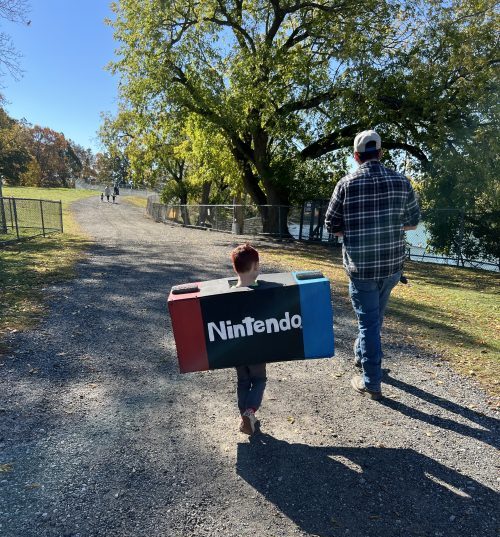
The night of Halloween we went trick-or-treating and gathered as much candy as we could. We made lots of people smile walking down the streets and all of the kids we would pass by kept running up to my son to push the buttons. He eventually got tired of wearing the costume and I ended up carrying it for the rest of the night. Still worth it.
Here’s the supplies that I used to make the DIY Nintendo Switch Halloween Costume:
- One large box
- 2-3 boxes, for parts
- Styrofoam blocks, any kind
- Acrylic paint (black, blue, red, white)
- Painters tape (if needed)
- Hot glue gun
- Light strip
- Tape
- Zip ties
- X-acto knife

Leave a comment